> ## Documentation Index
> Fetch the complete documentation index at: https://restorecord.mintlify.site/llms.txt
> Use this file to discover all available pages before exploring further.
# Setup a Custom Bot
> Make it easier for your members to verify on your Discord Server.
It's strongly advised to familiarize yourself with our bot security guide before taking any further steps. Keep in mind, if your bot gets disabled, all members will be lost!
Follow the instructions given to minimize the risk of your bot being disabled.
## Creating a Bot
> First, head over to [Discord Developer Page](https://discord.com/developers/applications) and create a new Application.
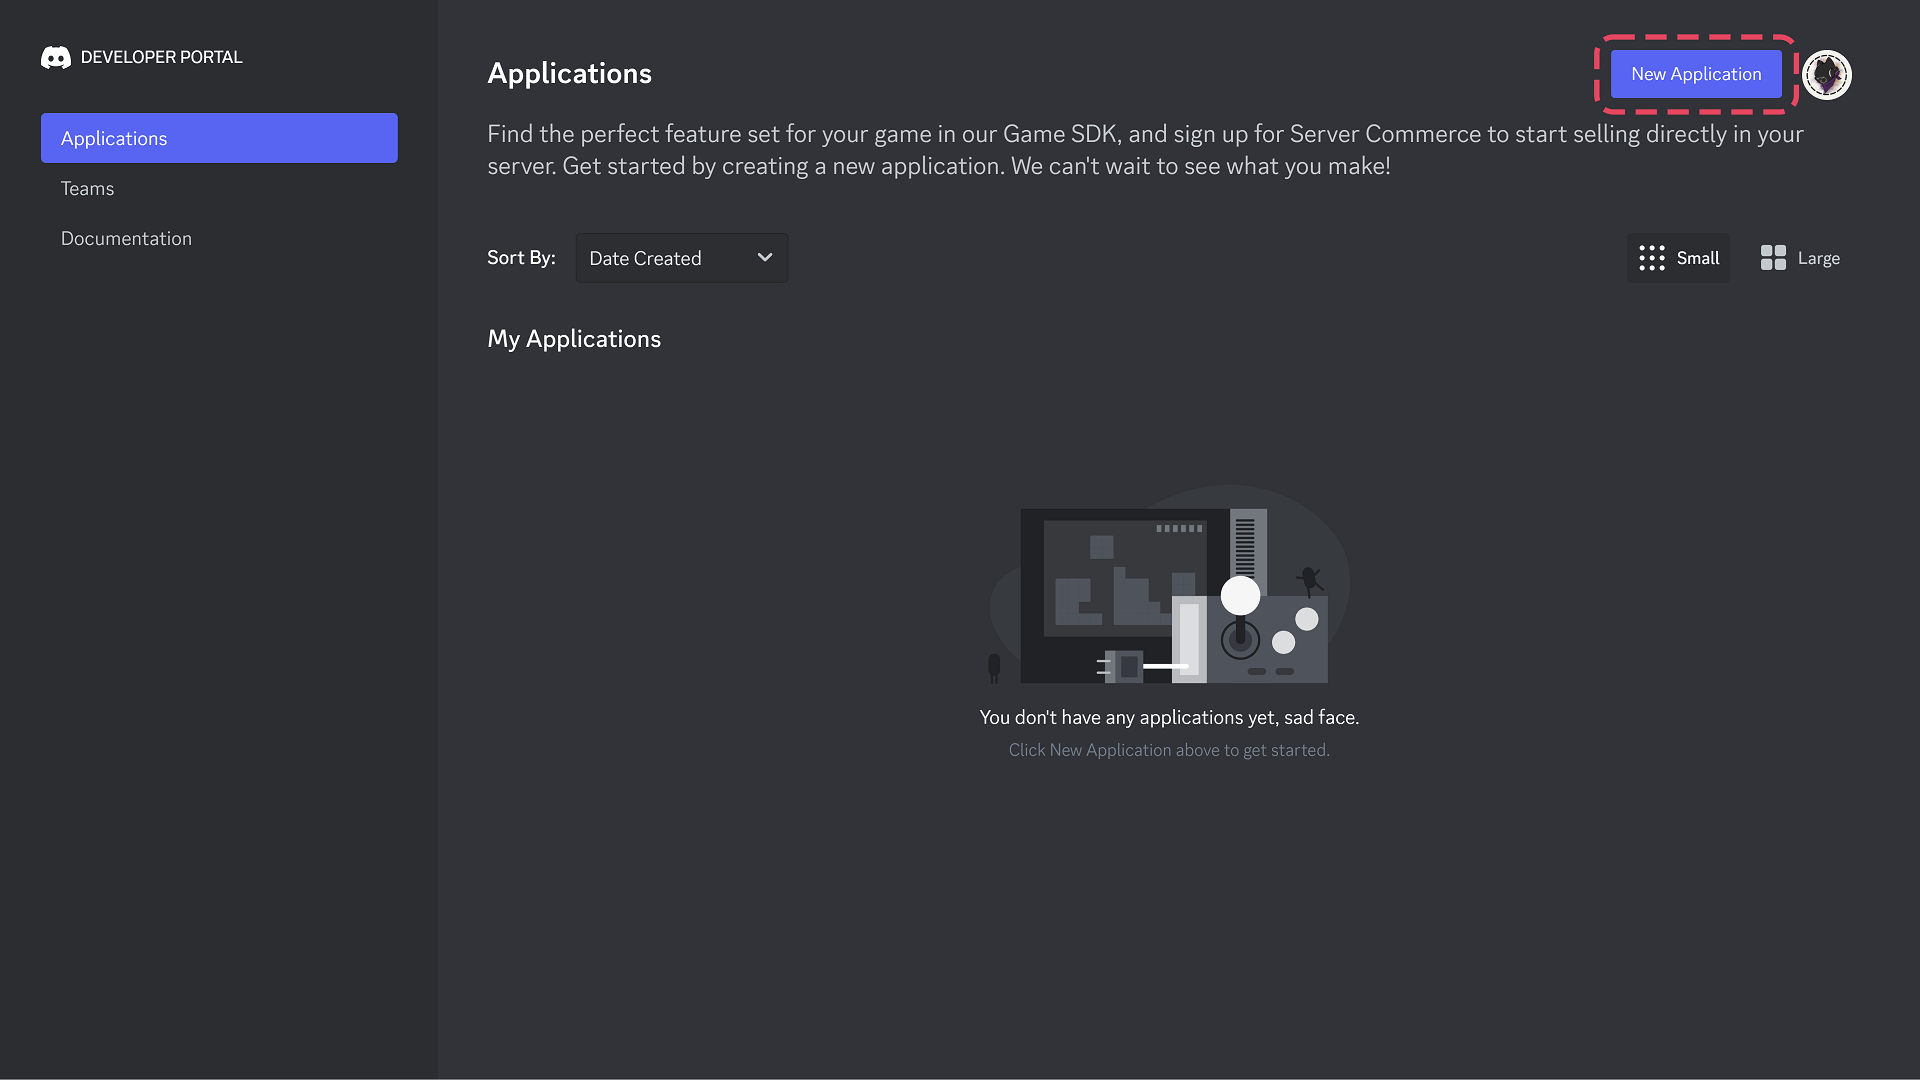 >
Give your Application an appropriate name, the name will be displayed to your members.
> After creating an application, you have to create a bot as shown on the screenshot.
>
Give your Application an appropriate name, the name will be displayed to your members.
> After creating an application, you have to create a bot as shown on the screenshot.
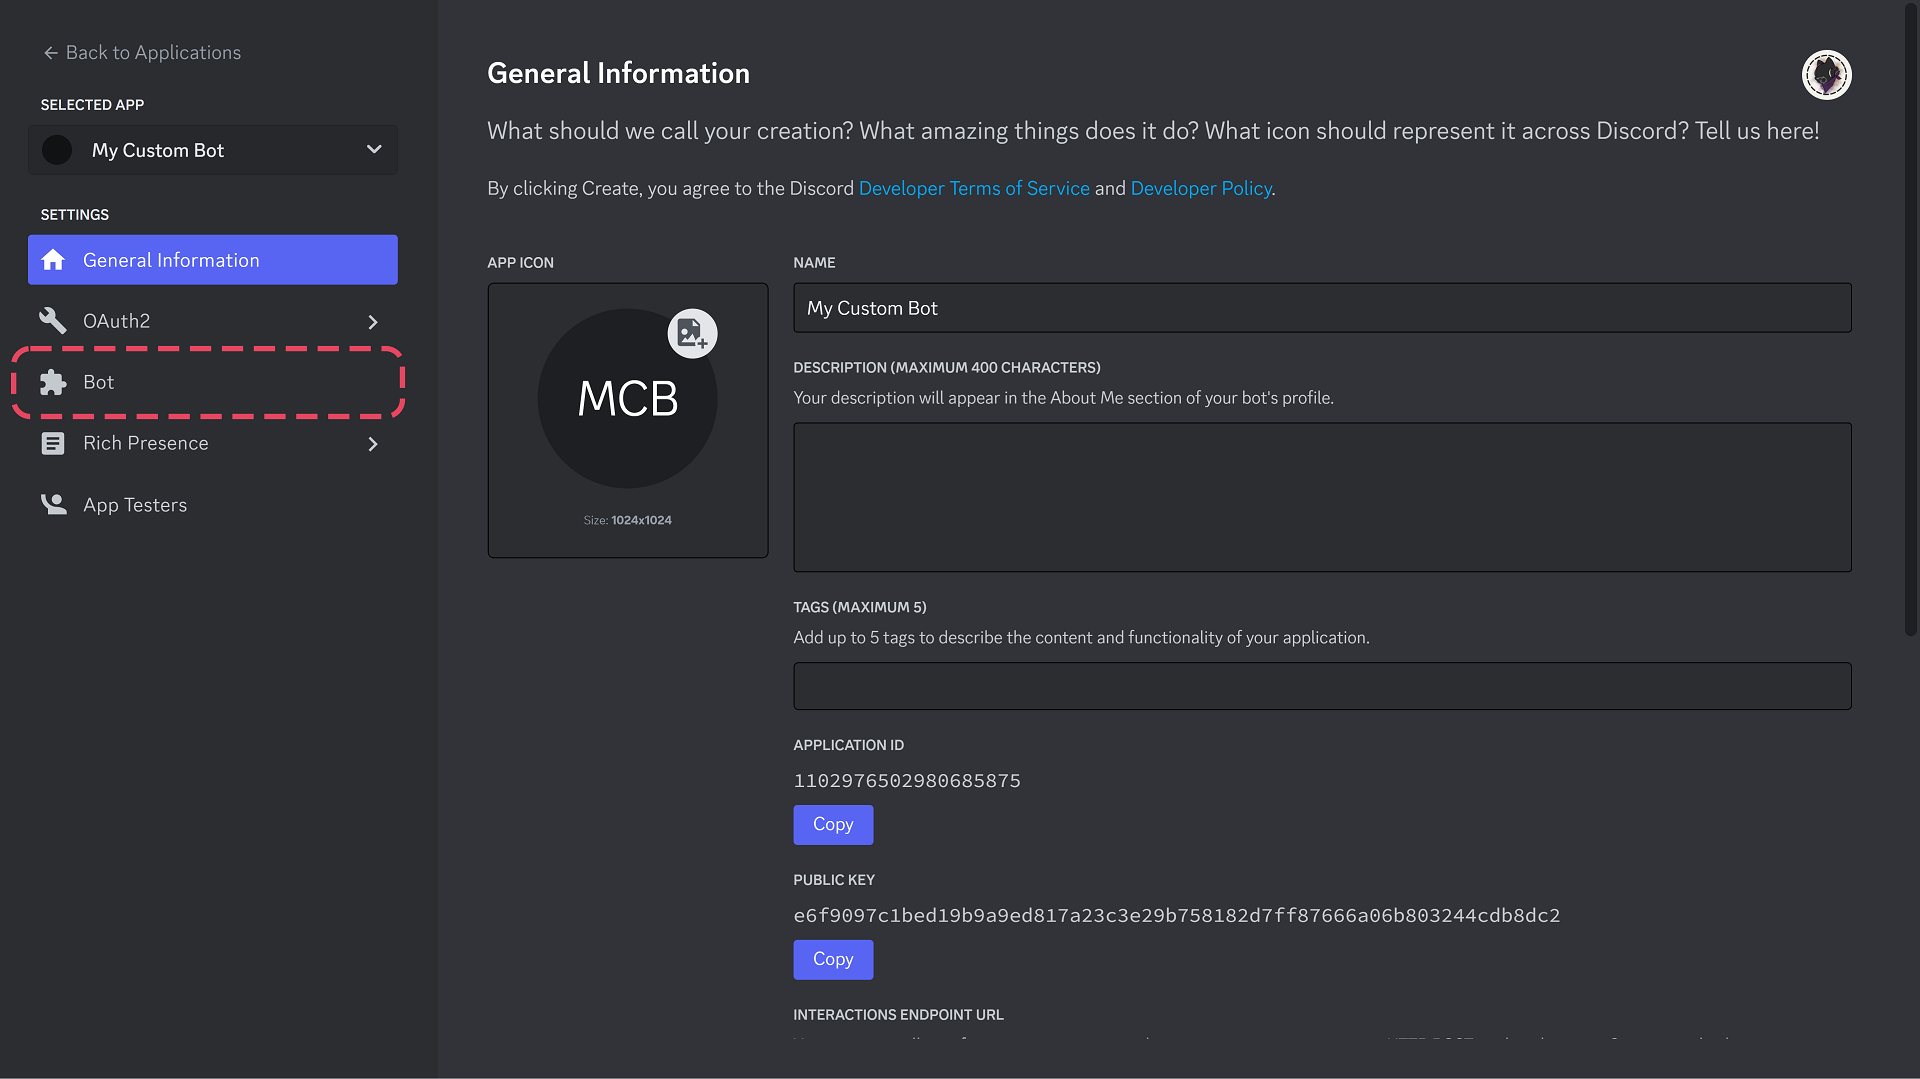 >
You may change the bots name to anything you want, make sure you use an appropriate name. This name will be displayed on the member list.
## Adding your bot to RestoreCord
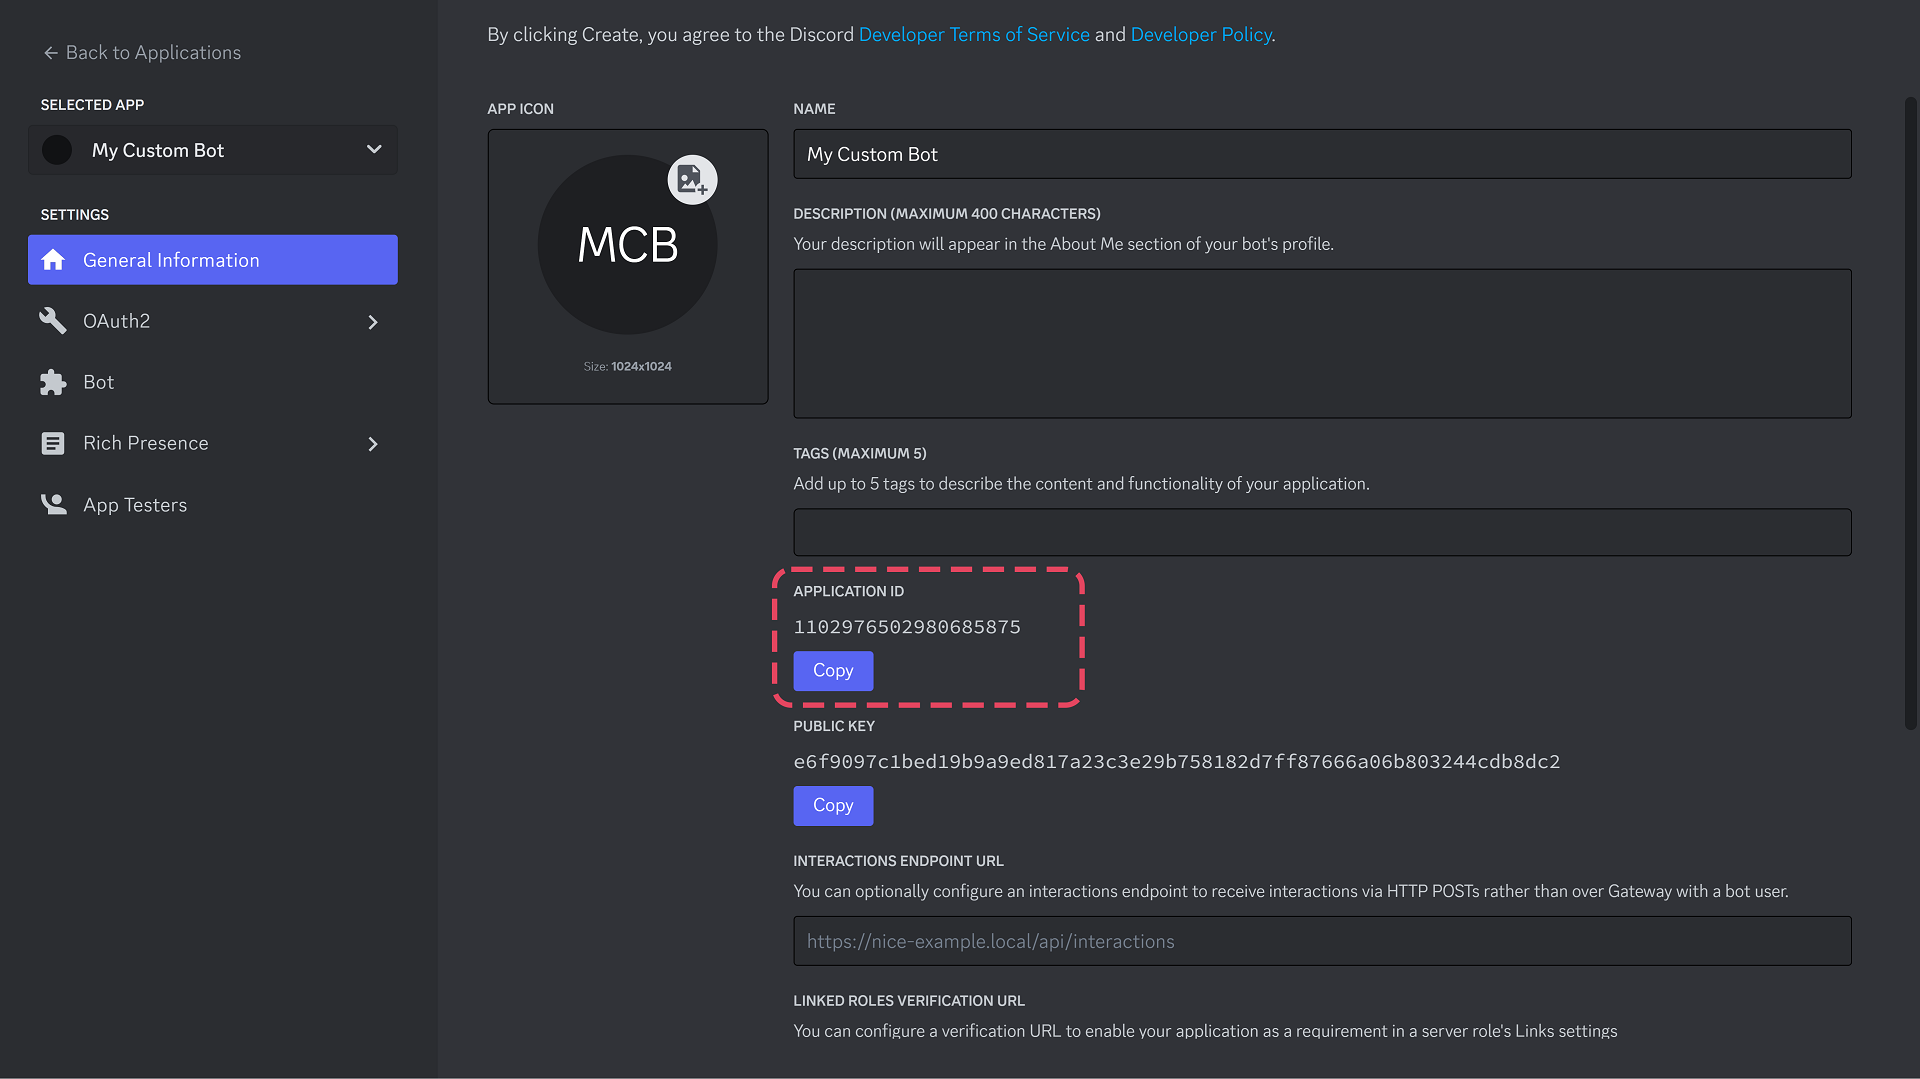
> Head over to the Dashboard, select Custom Bots in the navigtion bar and click "create", then follow the requested information shown on the dashboard.
If you need help finding them, look at the tabs below.
You may choose any bot name you want, this name will only be shown on the dashboard.
Application -> General Info
>
You may change the bots name to anything you want, make sure you use an appropriate name. This name will be displayed on the member list.
## Adding your bot to RestoreCord
> Head over to the Dashboard, select Custom Bots in the navigtion bar and click "create", then follow the requested information shown on the dashboard.
If you need help finding them, look at the tabs below.
You may choose any bot name you want, this name will only be shown on the dashboard.
Application -> General Info
 Application -> Bot -> Reset Token"
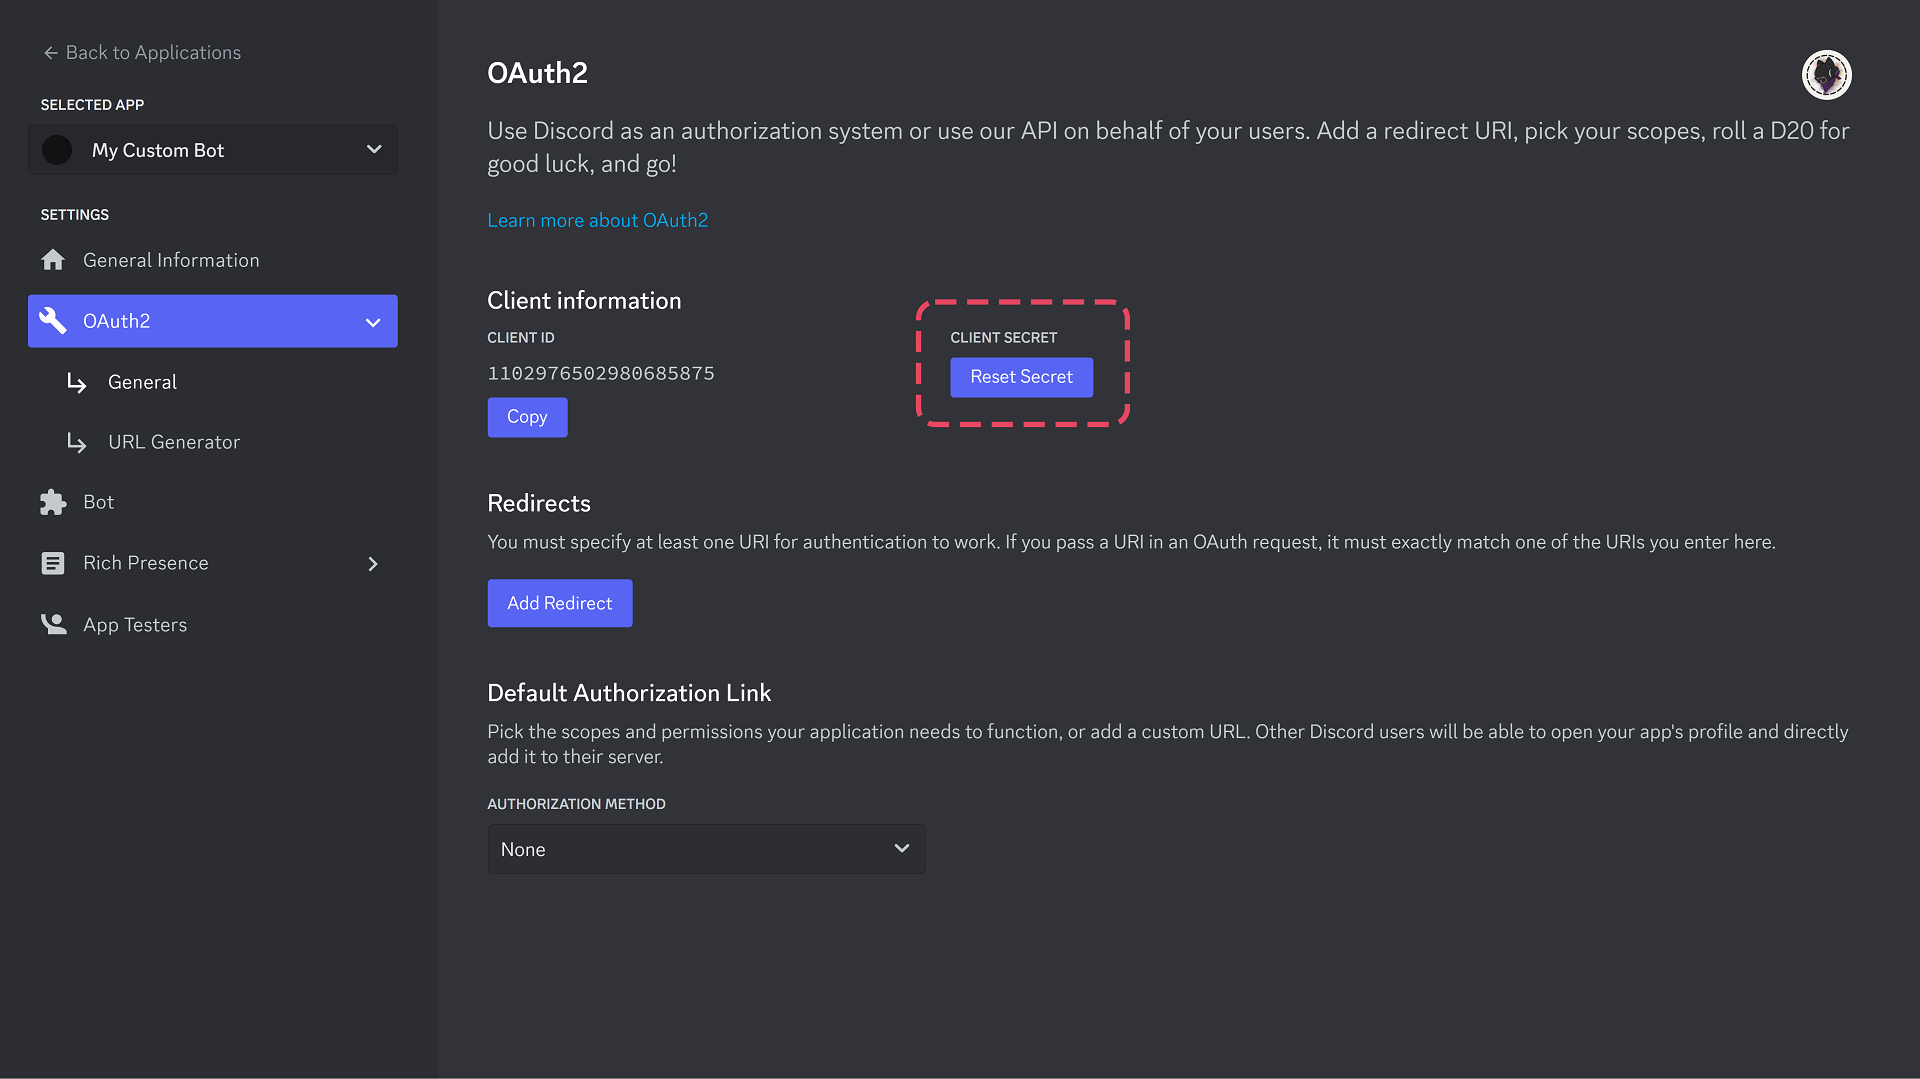
 Application -> OAuth2 -> General -> Reset Secret
 This is only for users on our paid business plan.
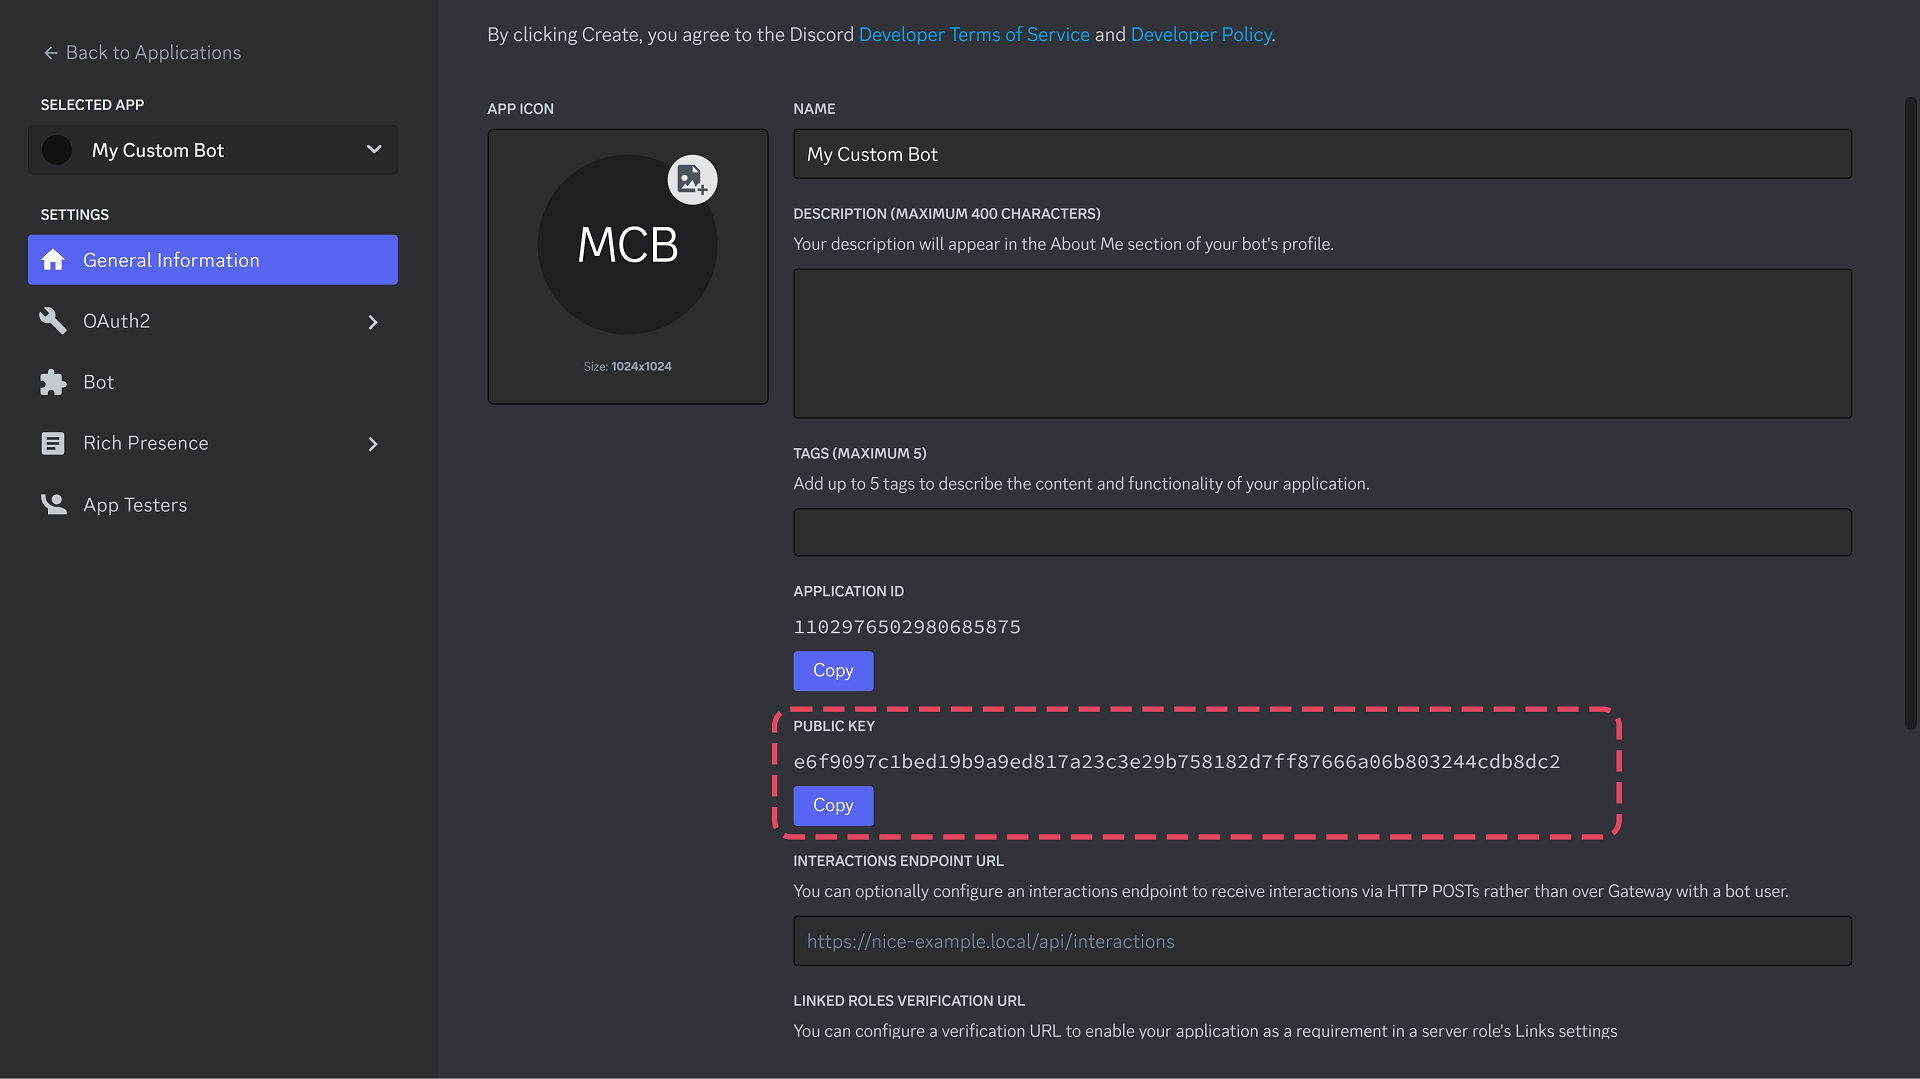
Application -> General Information -> Public Key
This is only for users on our paid business plan.
Application -> General Information -> Public Key
 ## Setup Redirect URL
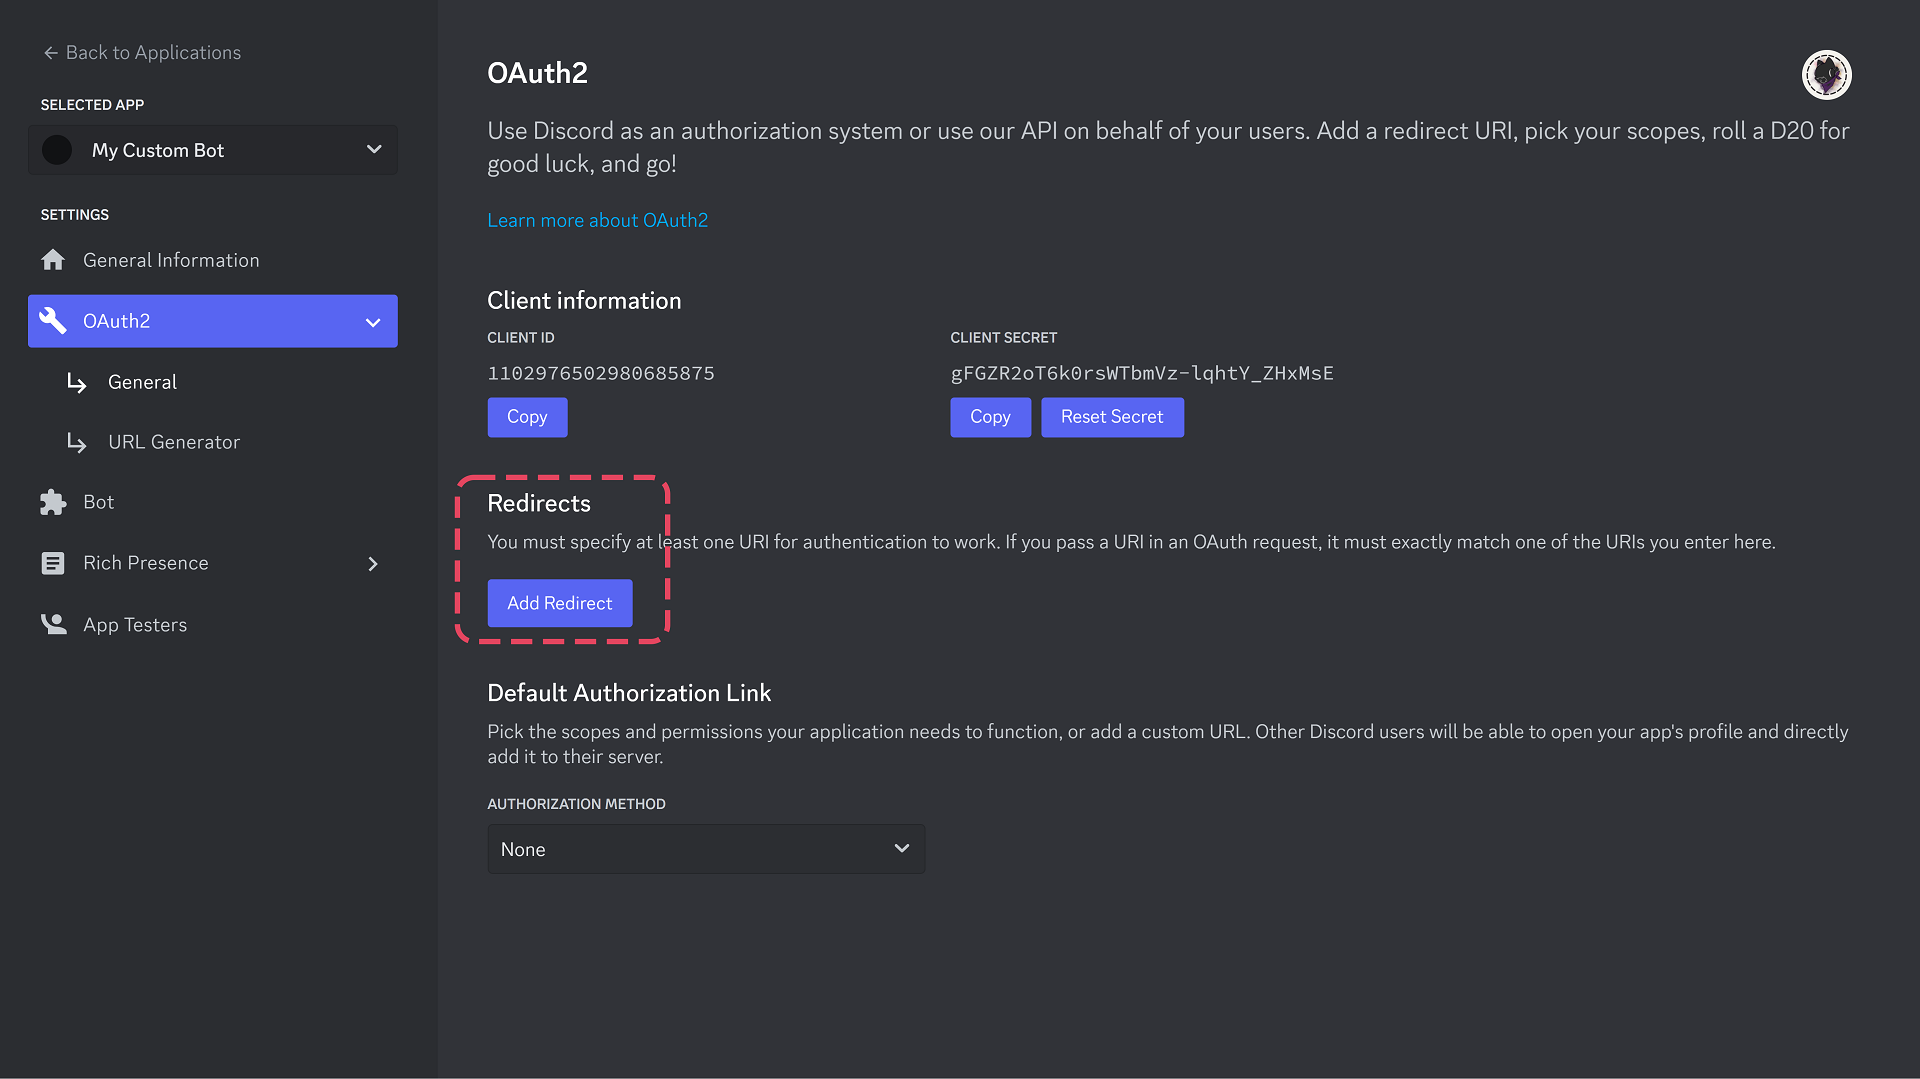
> After adding your bot on the dashboard, you need to add our Redirect Url on Discords Developer Page as shown:
## Setup Redirect URL
> After adding your bot on the dashboard, you need to add our Redirect Url on Discords Developer Page as shown:
 >
```
https://restorecord.com/api/callback
```
If you are using a custom domain. Replace `restorecord.com` with your domain.
A Custom Redirect domain hides our Service from your Users and Discord.
>
You have succesfully setup a Discord Bot for RestoreCord, you may continue to creating a server on our dashboard.
Add your Discord Server on RestoreCord.
If you have any questions, feel free to join our [Discord Server](https://restr.co/discord) and ask us anything!
>
```
https://restorecord.com/api/callback
```
If you are using a custom domain. Replace `restorecord.com` with your domain.
A Custom Redirect domain hides our Service from your Users and Discord.
>
You have succesfully setup a Discord Bot for RestoreCord, you may continue to creating a server on our dashboard.
Add your Discord Server on RestoreCord.
If you have any questions, feel free to join our [Discord Server](https://restr.co/discord) and ask us anything!